Showing posts with label cricut. Show all posts

Thursday, September 30, 2010

Wedding Gift Idea on a Budget-Etched Glass Baking Set

I'm going to give credit where credit is due.  I always do.  Ashley over at Make It and Love it did some glass etching like this and I loved it.  I have made this a couple of times for couples for wedding showers, and this gift is ALWAYS the hit of the shower-with the guests and more importantly, the couple. Everyone is always asking me where they can get a set!

Ashley did a small pyrex baking dish, with her name down one side, and cute trees down the other.  I loved the font she used. Smiley Monster-it's perfect for this project.  I found a 5 piece set of Anchor baking dishes at Wal-Mart for less than $16. Personalize it, and people think you really went all out!  I usually add some applique dish towels and little recipe cards of our favorite meals tied with a cute ribbon. 

Perfect gift.
For under $20.
Which makes it even more perfect for us penny pinchers!

Here is what I did to them all.
I used the same steps as I did here on the cookie jar.
(please excuse the pictures.  Etched glass is really difficult to get good pictures of! Especially at midnight! ;))


 I did their last name (Haukebo) down one side of the large baking dish,

 and "made with love" down the other side.

A simple "h" on the measuring cup.

I cut a mirror image of their name in a circle for the bottom of the pie pan. This way when half of a pie is gone, their name is peaking out from underneath.

Here's what it looks like from the bottom.  I did it on the bottom, because I didn't know if etching the inside of it would make food more likely to stick.

 Haukebo on the small baking dish.

They have a great sense of humor, so I couldn't resist doing "haukebowl" on the bowl! They LOVED it!

There you have it. A matching set of baking dishes! (That look like they cost well over the $16 you paid at Wally World!)

Katie (the bride) told me that this needs to be my signature bridal gift-that I will be known for the awesome personalized dishes!  Such a sweet compliment! 

Go forth, etch some dishes for a gift! (or for yourself!)
Remember, if you don't have a Cricut or Silhouette, you still do this! You will just need to trace whatever you want onto contact paper, use an exacto knife to cut it out, and you are good to go!

Today I am thankful for my car.  It's nice having a vehicle that I love and that is dependable!


Thursday, September 16, 2010

Glass Etching Tutorial-A Sweet Cookie Jar

I love glass etching.
My Granny Joyce first intoduced to to me about 10 years ago.  We etched glass blocks, made wooden bases for them that housed a light, and gave them for gifts. 

Did I mention that I love and miss my Granny Joyce?
They moved about 4 hours away and I miss em. Badly.
She calls me Angie-q-little.
I don't know why she does it, but I like it when she does.

Oh yeah...the cookie jar! Sorry I tend to get side tracked.
My Cricut sure makes glass etching easier.  When granny and I were making blocks, we would trace a stencil onto contact paper, and using an exacto knife, cut our pattern. Craft cutters take out all of that work for me! :) aaaannnd I'm not limited to designs of stensils. I can make my own stuff.

I found a cute cookie jar at Target.  I love Target, yes I do! I love Target, how 'bout you?! (Target is worthy of me channeling my inner cheerleader. I don't let her out often. Poor girl.)

I cut out the word "sweet" in smiley monster font with vinyl. Make sure you will have an inch or so around your design. That way your etching cream won't get on your glass where you don't want it. This is permanent, so you want to be careful with it.
Weed (remove) the design, leaving the negative space in tack.

Cut a piece of transfer tape (or contact paper) a little bigger than your design,
and press it smoothly onto your vinyl, rubbing around your design well.

Peel it away from the back paper, and press it onto your surface you are wanting to etch. Before you put the vinyl on, make sure to clean your glass well!

Carefully peel away the transfer tape/contact paper, leaving only your vinyl. Make sure all edges are securely pressed to the glass, so no cream makes it's way behing there. You want clean lines!

Apply your etching cream with whatever works for you. I have used q-tips, popsicle sticks, plastic knives, but generally I use a sponge paint brush.  Apply enough to cover your design...don't do too much though or it will try to run on ya!


The bottle says to do it for 5 minutes, but I always do 20. I'm a rebel like that. And I think it works bettter if you leave it on a little bit longer. But that's just my opinion.


After the time has elapased, wash it thouroughly with water. Use your hand if you need to. (Just wash your hands well after you do. I like to give mine project a good washin' with dish soap as well to make sure I'm not leaving behing any cream.

Dry it, fill it with your favorite peanut butter cookie recipe, and you have a sweet cookie jar!

If you don't have a Cricut or Silhouette, you still do this! You will just need to trace whatever you want onto contact paper, use an exacto knife to cut it out, and you are good to go!
I will post another etching project I'm working on for a wedding gift soon.

Today I am thankful for Jesus's saving grace. I don't deserve it (nor could I ever), but I don't want to imagine where I would be without it!


Tuesday, September 14, 2010

Grandparent's Day Gifts

Did you see the Friendship Board that Alison over at HowDoesShe made?

I love everything she makes.
Her stuff is adorable.

Grandparent's day was Sunday, and when I saw her friend board, I knew it would be perfect for grandparents!  Gifts from the heart (especially handmade ones) are, in my mind, the best!
I called my sister and asked her to ask her girls what they think of when they think of my parents.

This one was for my parents:


This one was for my in-laws.
I then started laying out words in SCAL that describe them, starting with Grandparents, Nana, and Deedaw (or Papa and Cici). I added in grandkids names, and started resizing stuff and moving it around until I found a layout I liked.
(They have the cutest fonts...find them here and here!)

Drill holes in the top corners, run your wire through, and curl it for the hanger.
I cut 4 flowers out of cardstock...2 large, 1 medium, and 1 small for each board. I used my fingers to curl the edges up a bit, and glued the layers together.
Then I stuck a blob of glue (clear-drying glue) in the center and poured small beads on it.
I gently pressed the beads into the glue, and glued the flower onto the board.

My parents and in-laws really enjoyed reading the words that we came up with to describe them!

Today I am thankful that I grew up in the same town as all 4 of my grandparents, and 2 of my great grandparents. Family is so precious to me!


P.S. Our baby boy is doing wonderfully! Thank you to each of you for the kind words, thoughts, and prayers!  It means so much to us!

Monday, August 2, 2010

Birthday Time!

My baby girl just turned 4 and we had her birthday party Saturday.  I've been in denial that my first born is 4, but now that we have celebrated it, I guess it's time for me to deal and come to terms with it. I can't believe how time flies with little ones!  When it took 4 days to induce my labor, I felt like she would never get here, then I blinked...now I have a 4 year old and a 1 year old!  Mazi Dutch was born just 6 days after my husband's and my 1st anniversary.  I told him he would have a hard time topping that gift! Then less than 3 years later, he gave me a son a week before my birthday. The man has good timing on his gifts! Mazi is my great-aunt's name, and Dutch is my granny's name. They are sisters, and both extraordinary women. We kept both of our children's names a secret during my pregnancies, and introduced them after they were born. My granny was there when we introduced her name-sake (at 2 am!) and called her older sister, Mazi, to tell her the news in the middle of the night. We have it all on tape, and it was so neat!  (Mazi and Dutch aren't their birth names, rather their nick-names that they have gone by since they were kids.)

I love love LOVE  celebrating my kids' birthdays! I love how happy it makes them, and celebrating them and the joy that they bring to our family.  For my daughter's birthday this year, she wanted a princess cake. I had decided a couple of months ago that I was going to make it.  I have some cousins who had a bakery and did amazing work, but decided they didn't want to do it anymore and closed up shop. So- I decided "I can DO this."  Mazi loves to watch Cake Boss and Ace of Cakes, so I imagine her expectations of a birthday cake are pretty high! Ha! I had an idea of what I was going to make, but a few days before her party I started to stress a bit over whether I could pull it off...It wasn't a perfect cake by FAR, but Mazi loved it and it was a hit at the party, so I'm going to file it in the success category! (Success that needs improvement is probably a better category!)

Here it is:
I made 3 batches Marshmallow Fondant using this recipe. I love Make it and Love it. Ashley has so many cute projects, and she enlisted her friend, Brittany to do a Make a Cake Series. I can't tell you how much her tips and tutorials helped me make this cake!  You can check out her work here, The girl is SO TALENTED!  I used this recipe for the buttercream inbetween the layers and under the fondant. It is SO delicious (and beyond easy)! I used my Cricut and SCAL and cut out letters for her name, a number 4, a princess silhouette, a Cinderella shoe, and a princess crown on cardstock. I rolled out the fondant, placed the cardstock shapes on it, and with an exacto knife, cut out the pieces. I also made some pink and purple sugar jewels to put around the cake. The crown was made out of Gumpaste.
I made several tissue paper pom poms to have floating above the cake table. They were so easy and really inexpensive to make. The instructions can be found here. They are now hanging over Mazi's bed in her room. She LOVES them!
I also made a banner with my Cricut.  I bought all of the paper at Hobby Lobby.  I decided how big I wanted each triangle, how many I needed, and cut them out.  It could have been easily done by hand, but everything is more fun with a Cricut! :) Then I cut out the letters, glued them on, used blue glitter glue around the letters, attatched them with ribbon, and I was done.  All for under $6.  (I caught the paper 50% off that day!)
 
Next I made Oreo Suckers, Birthday printables, and a Happy Birthday 2x4. All of which can be found over at HowDoesShe. I adore their blog and ideas!
Check out these Cake Balls turned Ice Cream Cones!  Have you ever had cake balls? They are sooo yummy.  All you do it bake a cake (any flavor) and crubble it up. I use my food processor.  Then you add about 3/4 can of frosting. Mix it up, roll it into balls, and dip them in chocolate or candy melts. Bakerella has made every kind imaginable...and they are the cutest darn things! She posted pictures of some ice cream cone cake balls that she had made out of sawed off waffle cones recently that are going to be in her book. (I can't wait to get my hands on it!)  Anyway, I found these little ice cream cones at the store that are TWO INCHES TALL!! Oh they make me happy. 
Seriously. Look how teeny.  A.dor.able.
I filled a bucket with pink candy covered pretzels, and another with the rest of the oreo suckers, made some pink lemonade, and we were ready for a party!
I made Miss Mazi a cupcake tee from this tutorial, and a tutu.  I had made my son a cupcake applique tee for his birthday and had been looking for a way to girl-it-up. When my friend sent me a link to this tutorial, I immediately made one!

After the cake and present part was over, we headed outside for some water fun! My parents have an awesome water slide that they let us use. They kids had a blast!
My sister coated my kids in sun block, and my little guy was in Heaven. He thought she was giving him a massage! He just melted right there in her lap!
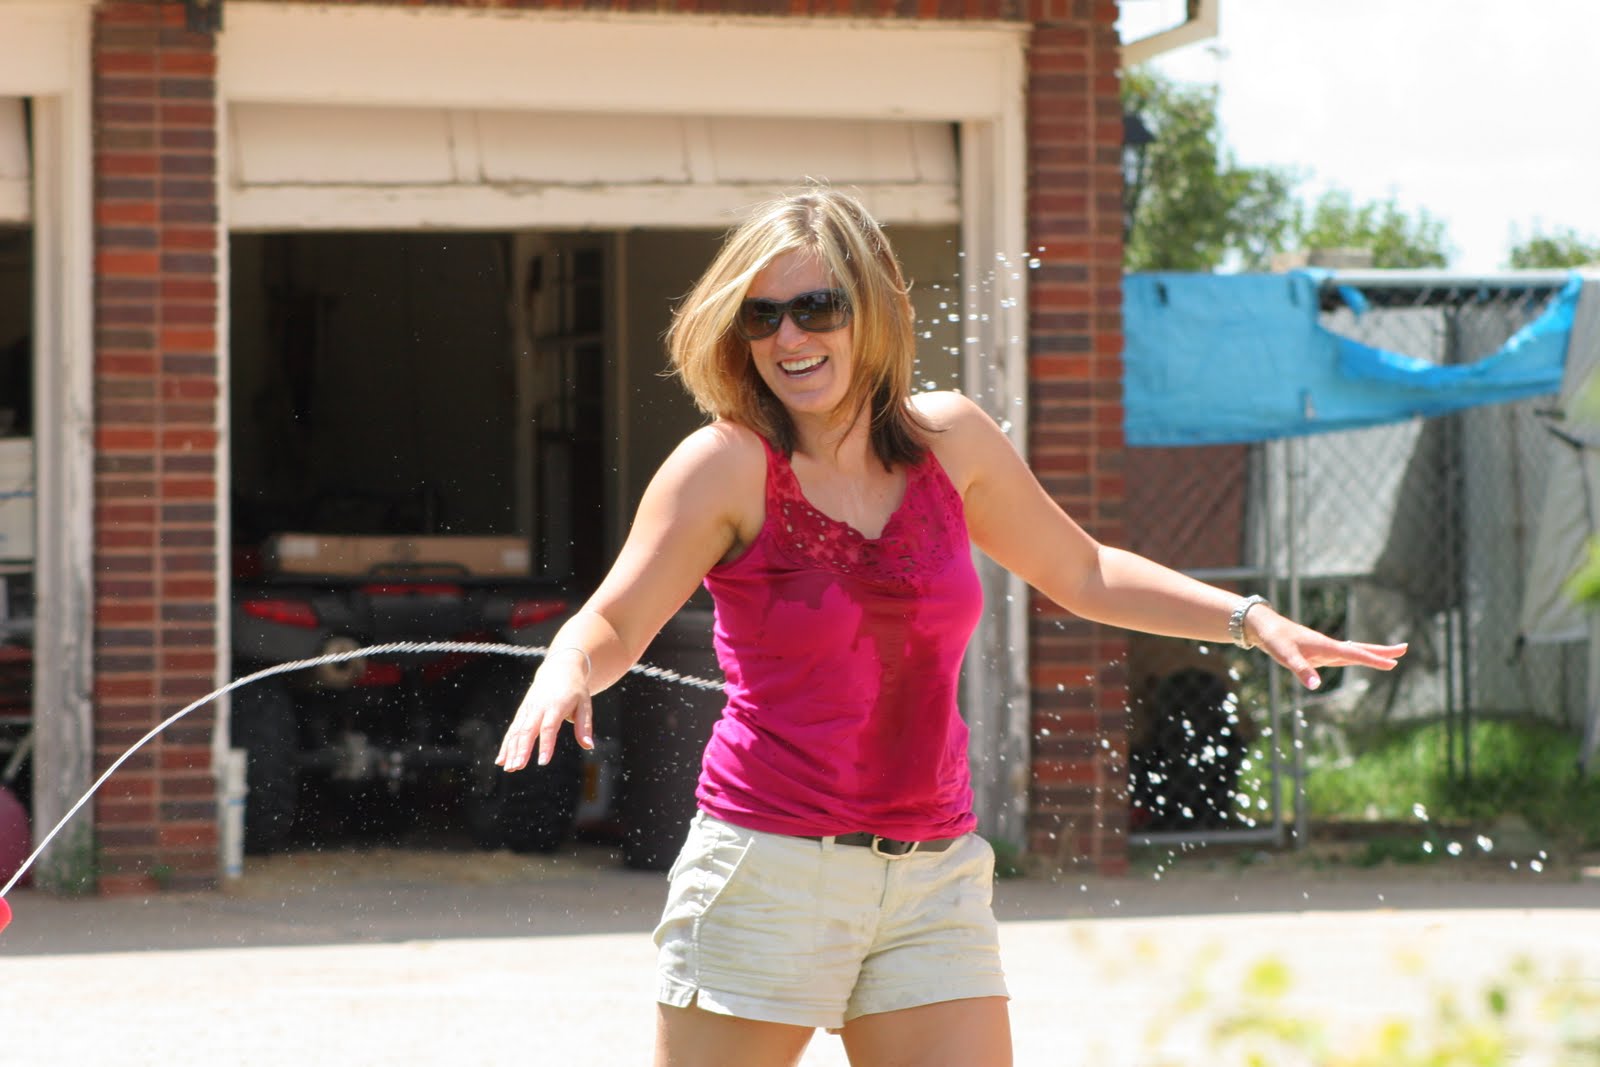
The birthday girl thought that DeeDaw (my dad) looked like he needed cooled off!
My sis was helping my baby use a water shooter when this happened...
Haha! She was a great sport! No one was off limits once they stepped into the grass near the water.
I think that my dad had just as much fun (if not more!) than the kids did!
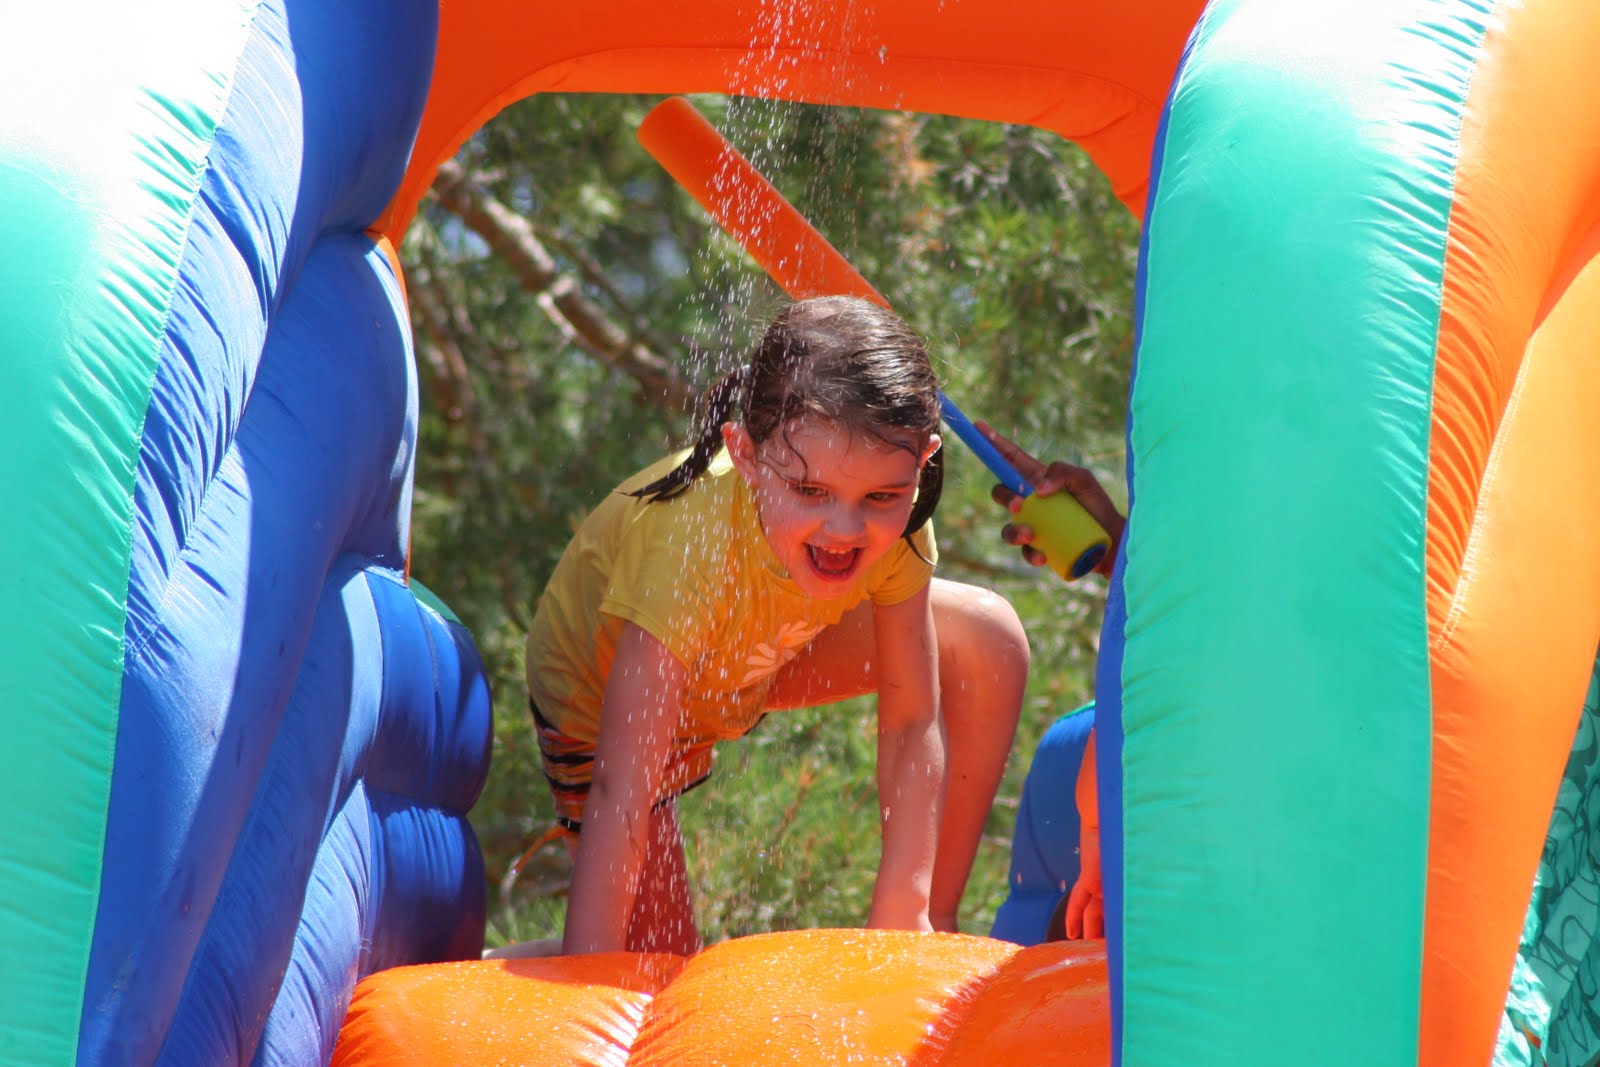
This is Calvin. The dude was serious with that water shooter! He was so quiet and sneaky and great at shooting unsuspecting people! I really enjoyed watching his sniper skills!
My baby was more at home on the sidelines. Things were a tad crazy for him!
The birthday girl was one happy camper.
My sweet little neice decided she needed to stop for a drink. :)
Bubbles!
My little guy found a hat at some point. He was pretty darn cute strutting his stuff in it.
After lots of playing, a cool watermelon sure hit the spot! I loved my baby girl relaxing in the baby pool with a slice! 


Today I am thankful for family, and wonderful parents who opened their home (and water slide!) to our family and friends to celebrate our daughter's birthday.  Parents are the best!